How to Dumb / Save SHSH of Current iOS Firmware with iFaith - iPhone, iPod Touch, iPad
Thursday, June 02, 2011
Few hours ago we broke the news with iH8sn0w new project which called iFaith, now I will show you how to use iFaith to dump SHSH blobs for your current firmware even if Apple is not signing.

Supported devices:
Pre-requirement:
Download iFaith for Windows.
Step 2: Press on 'Dmp SHSH Blobs'
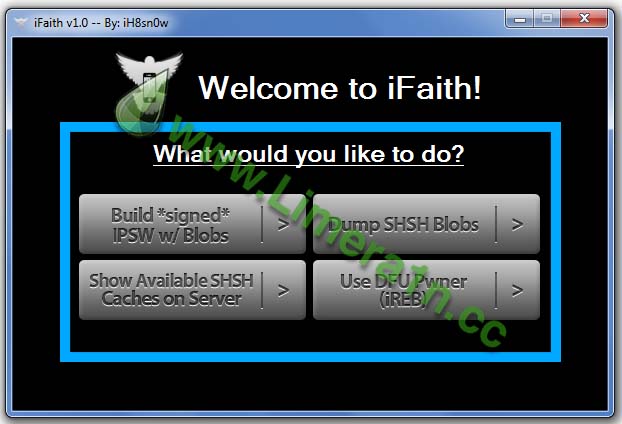
Step 3: Click 'Proceed' then 'Let's Go!' to start dumping SHSH.
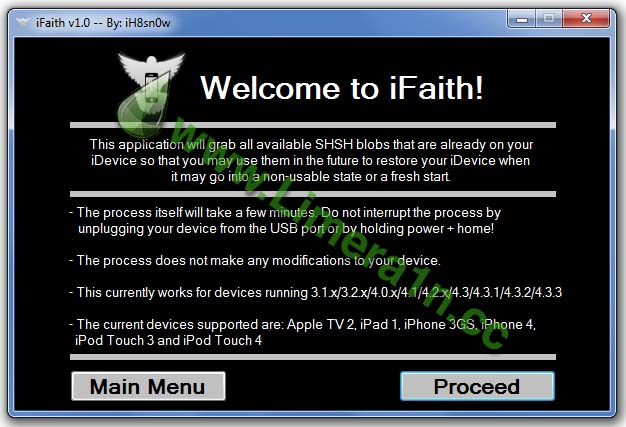
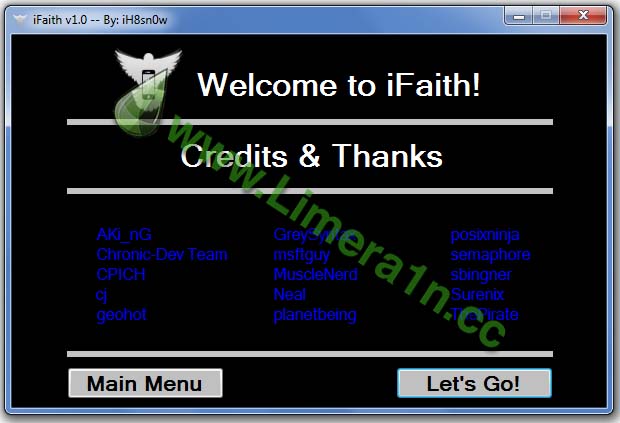
Step 4: Now make sure your device is both OFF and PLUGGED IN to the computer before you click “Start”.
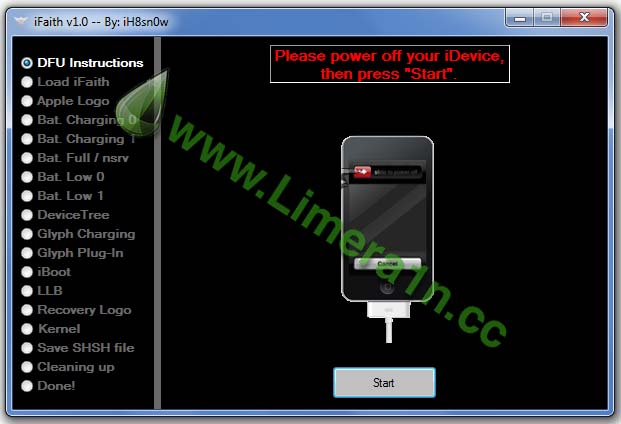 At this stage you will be presented with a screen where you will be guided on how to enter DFU mode. Quickly hold “Power” button and then while holding the “Power” button, you will now have to hold “Home” button too. Now after few seconds release “Power” button but keep holding “Home” button until installation begins.
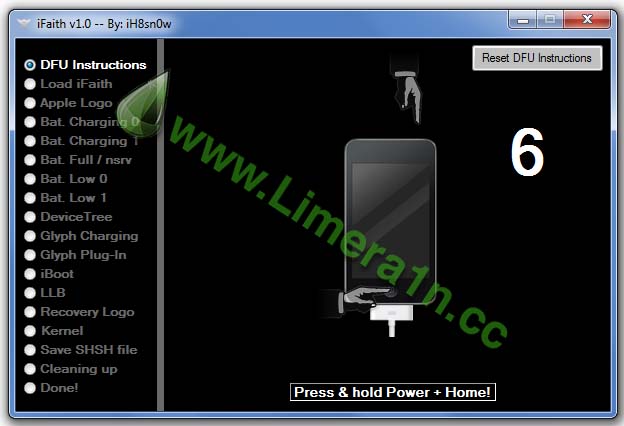
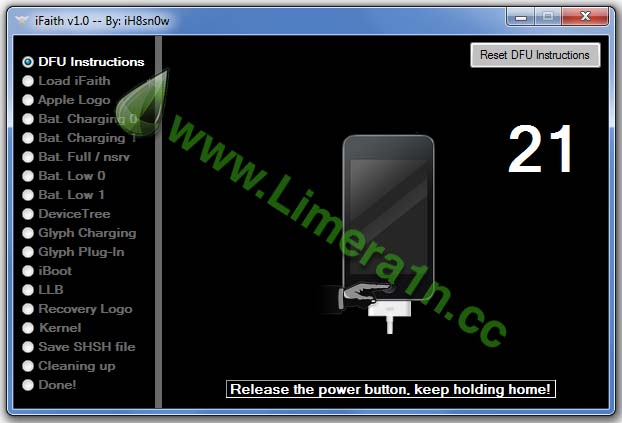 Step 5: iFaith now will start to finish some tasks that could take a few minutes.
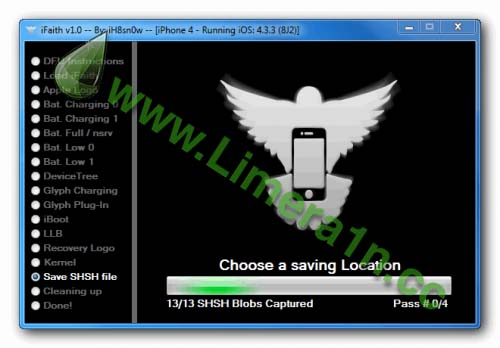 Step 6: Once completed, iFaith will ask you where to save the SHSH. Congratulations !.

Supported devices:
- iPhone 4, 3GS
- iPod touch 4G, 3G
- iPad 1
- Apple TV 2G
Pre-requirement:
Download iFaith for Windows.
How to use iFaith to save SHSH blobs for current iOS firmware :
Step 1: Launch iFaith, and press 'OK' button.Step 2: Press on 'Dmp SHSH Blobs'

Step 3: Click 'Proceed' then 'Let's Go!' to start dumping SHSH.


Step 4: Now make sure your device is both OFF and PLUGGED IN to the computer before you click “Start”.


If you found this post useful, dont forget to click the +1 button =>
You can follow Geohot on Twitter or become a fan on Facebook or by Email Subscribe to get All news Free
This entry was posted on October 4, 2009 at 12:14 pm, and is filed under
ifaith,
iH8sn0w,
SHSH
. Follow any responses to this post through RSS. You can leave a response, or trackback from your own site.
How to Dumb / Save SHSH of Current iOS Firmware with iFaith - iPhone, iPod Touch, iPad
Few hours ago we broke the news with iH8sn0w new project which called iFaith, now I will show you how to use iFaith to dump SHSH blobs for your current firmware even if Apple is not signing.

Supported devices:
Pre-requirement:
Download iFaith for Windows.
Step 2: Press on 'Dmp SHSH Blobs'

Step 3: Click 'Proceed' then 'Let's Go!' to start dumping SHSH.


Step 4: Now make sure your device is both OFF and PLUGGED IN to the computer before you click “Start”.
 At this stage you will be presented with a screen where you will be guided on how to enter DFU mode. Quickly hold “Power” button and then while holding the “Power” button, you will now have to hold “Home” button too. Now after few seconds release “Power” button but keep holding “Home” button until installation begins.

 Step 5: iFaith now will start to finish some tasks that could take a few minutes.
 Step 6: Once completed, iFaith will ask you where to save the SHSH. Congratulations !.

Supported devices:
- iPhone 4, 3GS
- iPod touch 4G, 3G
- iPad 1
- Apple TV 2G
Pre-requirement:
Download iFaith for Windows.
How to use iFaith to save SHSH blobs for current iOS firmware :
Step 1: Launch iFaith, and press 'OK' button.Step 2: Press on 'Dmp SHSH Blobs'

Step 3: Click 'Proceed' then 'Let's Go!' to start dumping SHSH.


Step 4: Now make sure your device is both OFF and PLUGGED IN to the computer before you click “Start”.


Subscribe to:
Post Comments (Atom)


